This post will teach you the best way to set up Dayparting using PPCProphet, so that your advertising campaigns are optimised to get the best performance based on the Day and Time.
Ads don’t perform the same at every hour of the day. Consumer behaviour differs, and in our analysis we’ve noticed that there are times when people are just browsing, without the intent to buy, but still costing advertisers for each and every click. This is where Dayparting comes in, and our Ad Scheduler Plus.
To access the Ad Scheduler, click on the Ad Scheduler icon on the menu.
You’ll be presented with a list of your connected clients, choose one, and then you’ll see a list of campaigns, choose one to continue.
NOTE: While Amazon’s Ad Scheduling restricts you to using Sponsored Products, the PPCProphet Ad Scheduler works with both Sponsored Brands and Sponsored Display, as well!
Once you’ve done this you’ll see a chart:
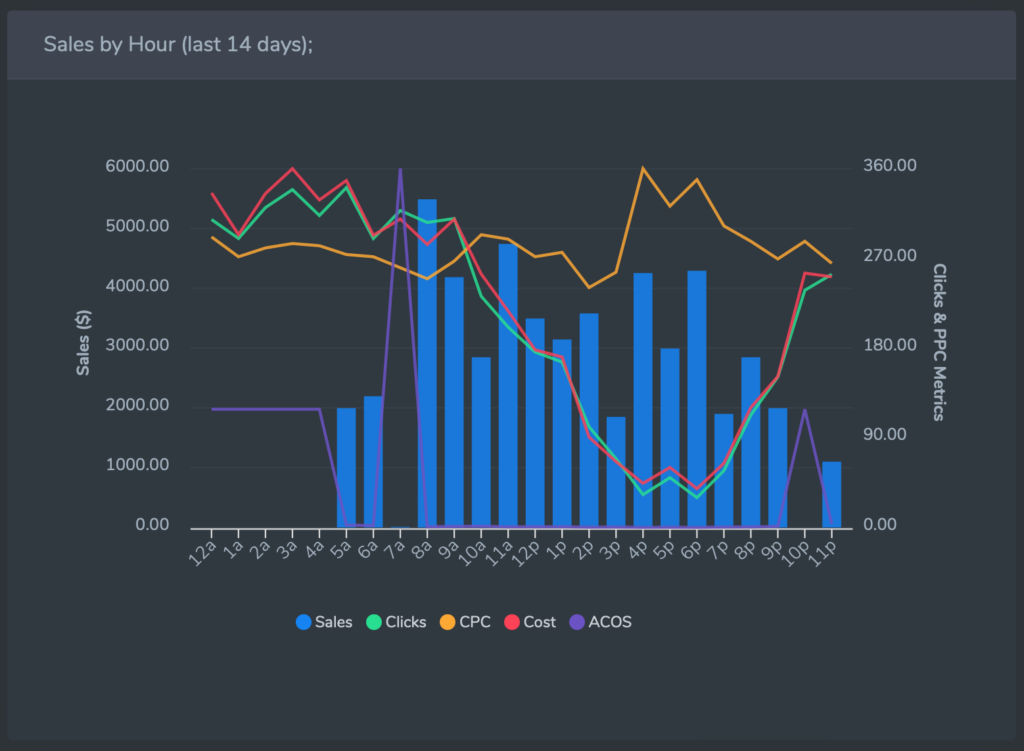
This chart will represent your campaign’s performance per hour over the last 30 days. The blue bars are your sales, but other metrics (acos, clicks, etc) are also visible.
Looking at this chart we can see a few things:
1. The most profitable sales are between 4pm and and 7pm despite CPC increasing. Sometimes that’s because it’s when your competitors daily ad budgets run out.
2. Their most expensive sales (where ACOS is highest)are between 5am and 7am.
3. Generally, all of their spend between midnight and 4am is non converting.
A reasonable optimisation for this campaign might be to reduce the bids between midnight and 5am. But before we get to that, there’s one more thing to check.
On the right hand side there’s a button, Individual Daily Schedule, if you toggle it to ON we get an additional chart.
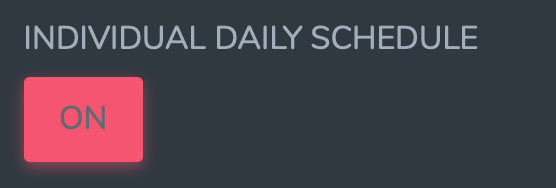

This chart also shows us the general performance per day, in case there are wild variations there. For this campaign the Tuesday sales are a bit low, and the ACOS (5%) is a bit low. There’s some chance we’d want to -increase- the bids on Tuesday specifically.
If we leave Individual Daily Schedule set to on, on our next screen will default to being able to specify different advertising schedules for each day.
NOTE: Don’t worry, we can always change this later.
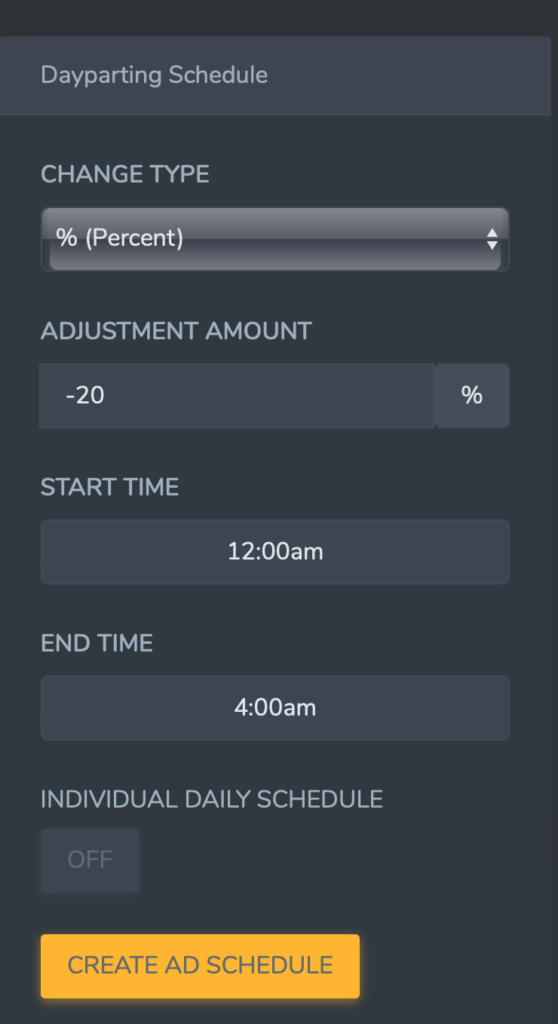
CHANGE TYPE – Can be either % – Percent or $ Amount. This allows you to change your bids during your scheduled time either relatively (“I’d like all my bids to increase 20%”) or absolutely (“I’d like to decrease all my bids by 0.20c”)
ADJUSTMENT AMOUNT – The amount of the change you’d like to make. Negative to reduce bids, positive to increase them.
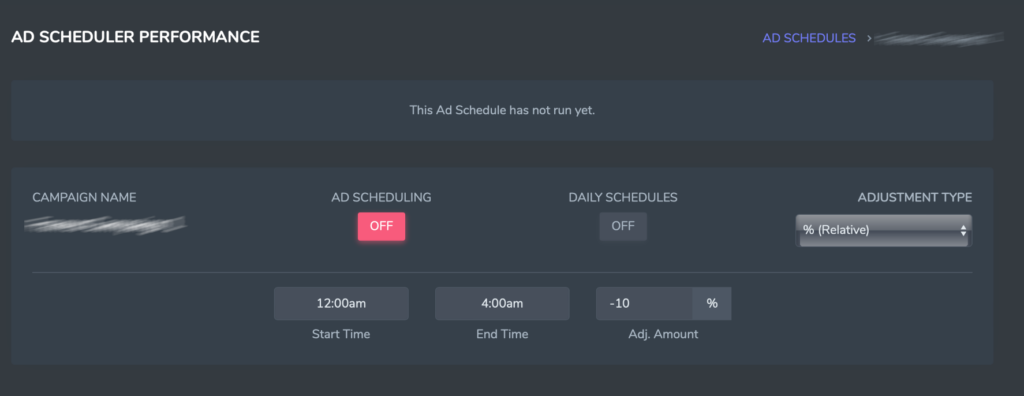
Once you’ve chosen your settings, click the CREATE AD SCHEDULE button to move to the AD SCHEDULER PERFORMANCE screen.
This is the screen where you can activate your Ad Scheduler so that it will start running the next day, there won’t be any data here to start, but if you’ve chosen INDIVIDUAL DAILY SCHEDULE, your screen will look like this.
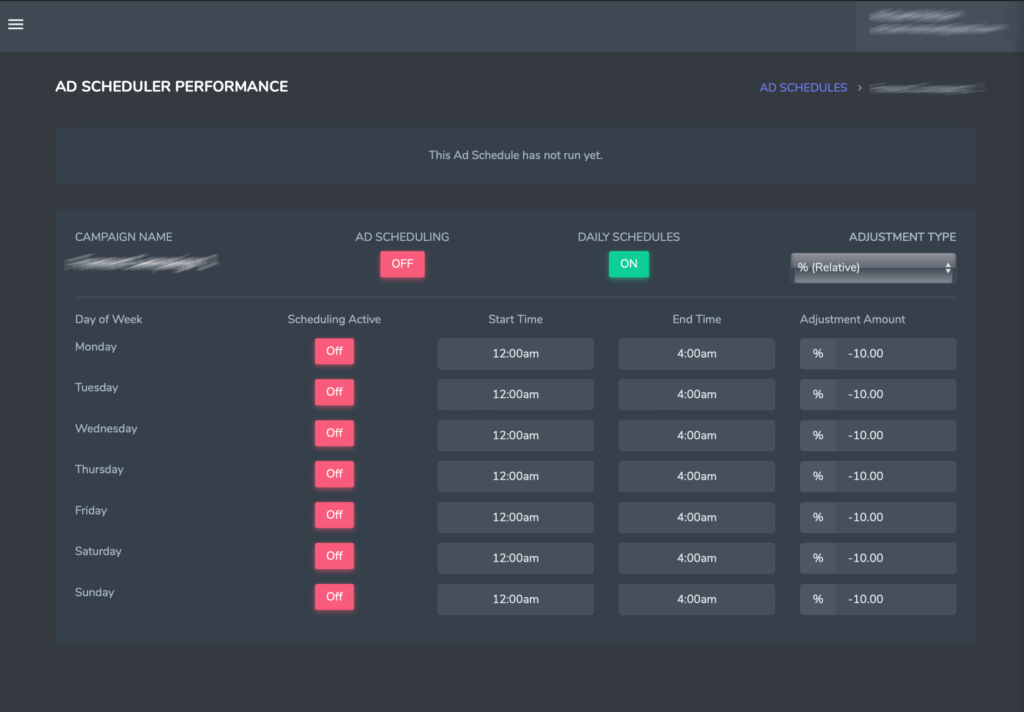
You can use this screen to choose which days your Ad Scheduling runs, and what time for each day. If you’d like a more streamlined optimisation, you can turn Daily Schedules off.
The last step is to turn on AD SCHEDULING and you’re done!
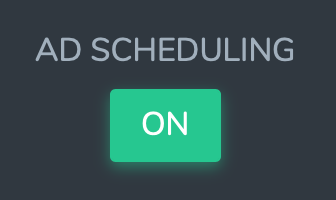
Your ads will now automatically have their bids adjusted upward or downward during the days and times that you’ve specified on this screen.
If you have any question please feel free to reach out to us.
No responses yet